8 Python
Python is a powerful and popular language, with strong support for scientific computing (including data science) through the Scientific Python (SciPy) packages. Often compared to R, Python has particular strengths in:
- machine learning via scikit-learn
- developer support (most developers know Python so you won’t be the only person in your organisation using it)
- web scraping and working with APIs
- support from cloud computing vendors (e.g. AWS Lambda)
8.1 What is Python?
From the Python website:
Python is a programming language that lets you work quickly and integrate systems more effectively.
There are two key differences between R and Python here:
Python is a programming language, not a software environment
Whilst there is a “reference implementation” of Python (known as CPython), there are many Python distributions. A Python distribution is an executable piece of software which can read and evaluate Python code. Popular alternative Python distributions include Anaconda Python and IPython. This means that Python refers to the language itself, rather than the software environment where you execute Python code. For most practical purposes you can consider each of these popular Python distributions to be equal, although we will learn about some extra capabilities that IPython provides.There is no mention of anything to do with data
Python is a popular programming language used across almost every industry - data science is just one community that has gravitated towards Python and built an ecosystem of open source packages to extend Python’s capabilities. This means that unlike R where vectors, matrices and data frames are first-class parts of the language, in Python you’ll need to use the numpy and pandas packages to get these capabilities.Some of the key selling points for using Python for data science include:
- Standardised interface for training and evaluating machine learning models (scikit-learn)
- Mature and stable package ecosystem
- Popular amongst developers
- Many examples of Python being used in production
- A single tool which you can use for end-to-end projects
- Open source and used across many countries and industries
- Excellent online documentation and learning resources
8.2 How Python Works
A Python distribution is typically installed as an executable application on your computer. Once installed, there are a few different ways that it can be used:
- Interactive code execution
- on the command line (type
pythonthen hit enter)
- on the command line (type
- Script execution
- on the command line, type
python my_script.pyto run a script from start to finish, directly from the command line
- on the command line, type
- Interactive and script execution via an Integrated Development Environment (IDE)
- Notebooks
All of these deployment options have one thing in common: they all require a Python distribution to be available on the system where they are being hosted. This means that unlike many compiled languages (C, C++, Swift, etc) they require Python to be installed on every computer where the code needs to run - you can’t just send someone a file and expect them to run it without installing anything.
In practice this means that people will often share analytical work using either:
- hosted services (via an API, a scheduled script, or a web application)
- static versions of Jupyter Notebooks
You can also set up your own hosting environments by installing directly onto a server or by deploying a Docker container - we’ll cover the Docker option in detail in a later chapter of this course.
One peculiarity of Python is that there are two major versions still in use: Python 2 and Python 3. Despite the fact Python 3 was released over 10 years ago, many programmers still refuse to move away from Python 2. This has caused a significant fork in the language, and means that you may come across code that does not run in your own Python environment. This should become less prevalent over the next two years due to widespread agreement to stop supporting Python 2 by the end of 2020. Importantly, all of the major data science packages for Python have agreed to drop Python 2 support by 2020. In fact pandas, numpy and scikit-learn have all stopped supporting Python 2 since the end of 2018.
8.3 Setting up a Python Environment
Python can be a little harder to set up than R. This is due to the fact that you can have multiple versions of Python installed on your computer at once, as well as multiple distributions.
For example, on my macOS computer I have the following Python environments installed:
- Python 2.7.10 (preinstalled on MacOS)
- Python 3.6.3
- Anaconda Python 3.6.1
- Anaconda Python 3.6.5
This isn’t intentional, it’s just something that happens if you’re not paying attention to versions. It’s not a big deal but it does mean you have to be careful that when you run Python code, you know which version and distribution you are using to run it.
One nice feature about Anaconda Python (which you will install below) is that during the setup process it helps you resolve this problem by setting up your system so that the version you have just installed becomes the default Python choice on your system.Whilst it is easy to install a new Python distribution, it can be hard to keep track of which Python versions you have installed.
Some general rules of thumb:
- Don’t ever modify the Python 2.7.10 installation on a macOS system - many Mac services rely on this specific version and your computer will stop working if you mess with it. If you want to use Python, install Python 3 by yourself.
- Pick a Python distribution and stick to it. In this course, we will only use Anaconda Python.
With all of that said, installing Python is fairly straight-forward. Head over to the Anaconda Python download page and download the latest version of Python - at the time of writing this is Python 3.7. Once downloaded, follow the prompts to install Anaconda Python. This will not replace any existing versions of Python on your system, but it make the latest version of Python the default version automatically.
Once installed, you can verify that your default Python installation is now a Python 3 installation. Open a new terminal (make sure you open a new one, rather than using an existing one) and type the following to check what version you are using:
If you have installed Anaconda Python correctly, you should see a version number of 3.7.1 or higher. If you have a lower version, try restarting your computer and trying again, and if that doesn’t work you should consult the Anaconda Installation Documentation. If all else fails, ask for help in the Slack channel for this subject.
8.3.1 Jupyter
Most data scientists using Python will start by using Jupyter Notebooks.
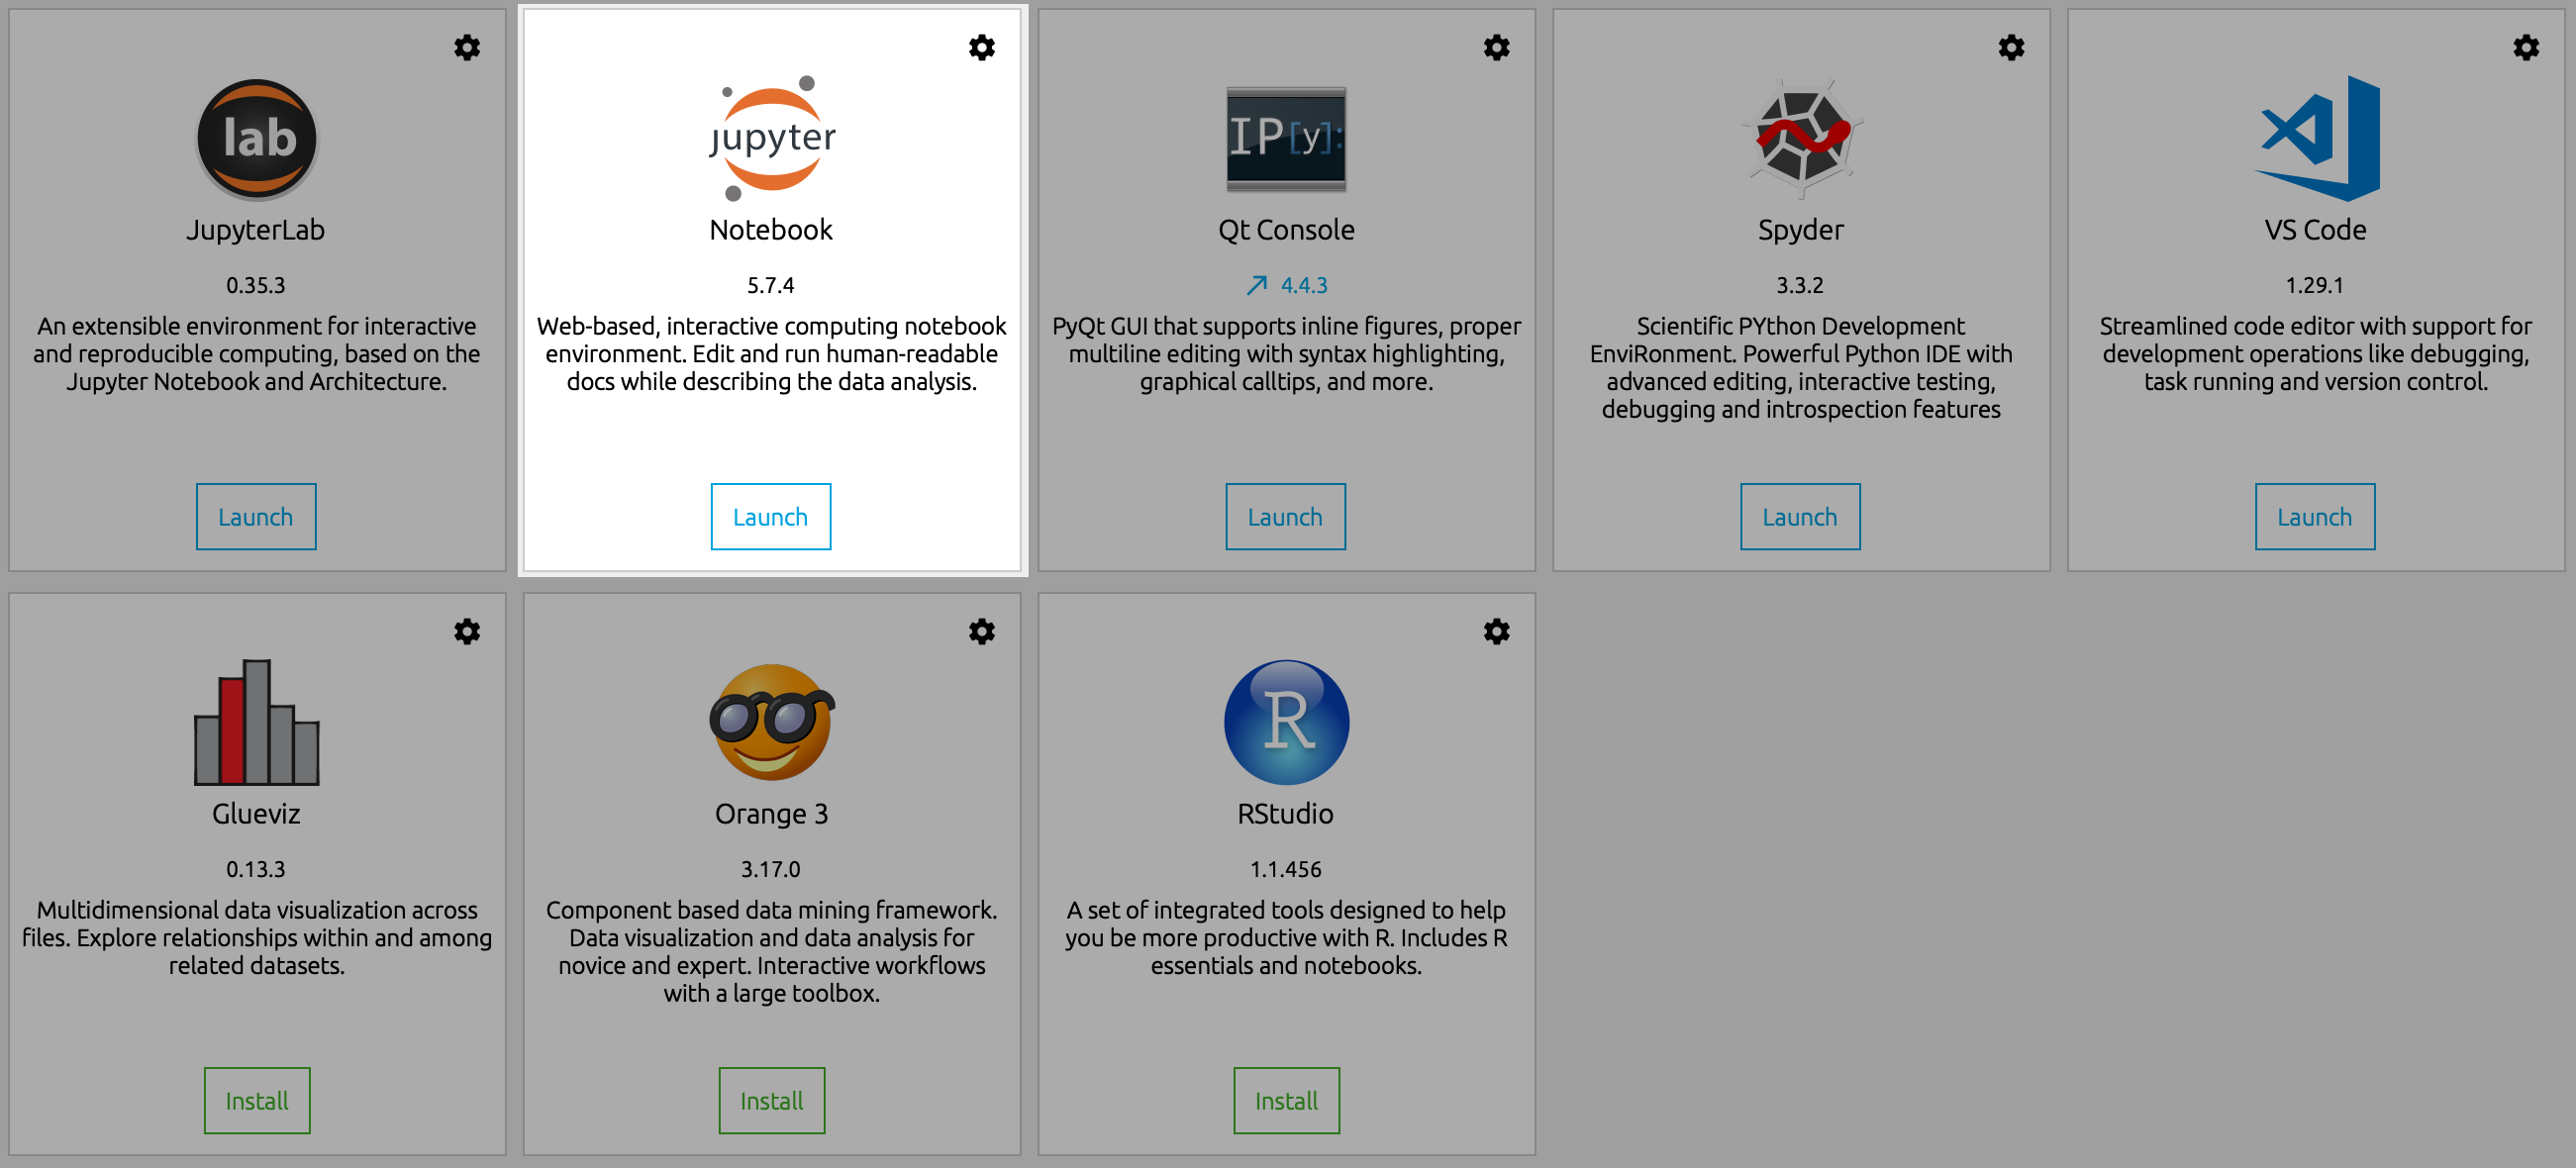
By default, Jupyter is installed as part of the Anaconda distribution, so it should already be available on your computer. To launch Jupyter, open anaconda-Navigator on your computer and click “Launch” to launch the Jupyter Notebook.
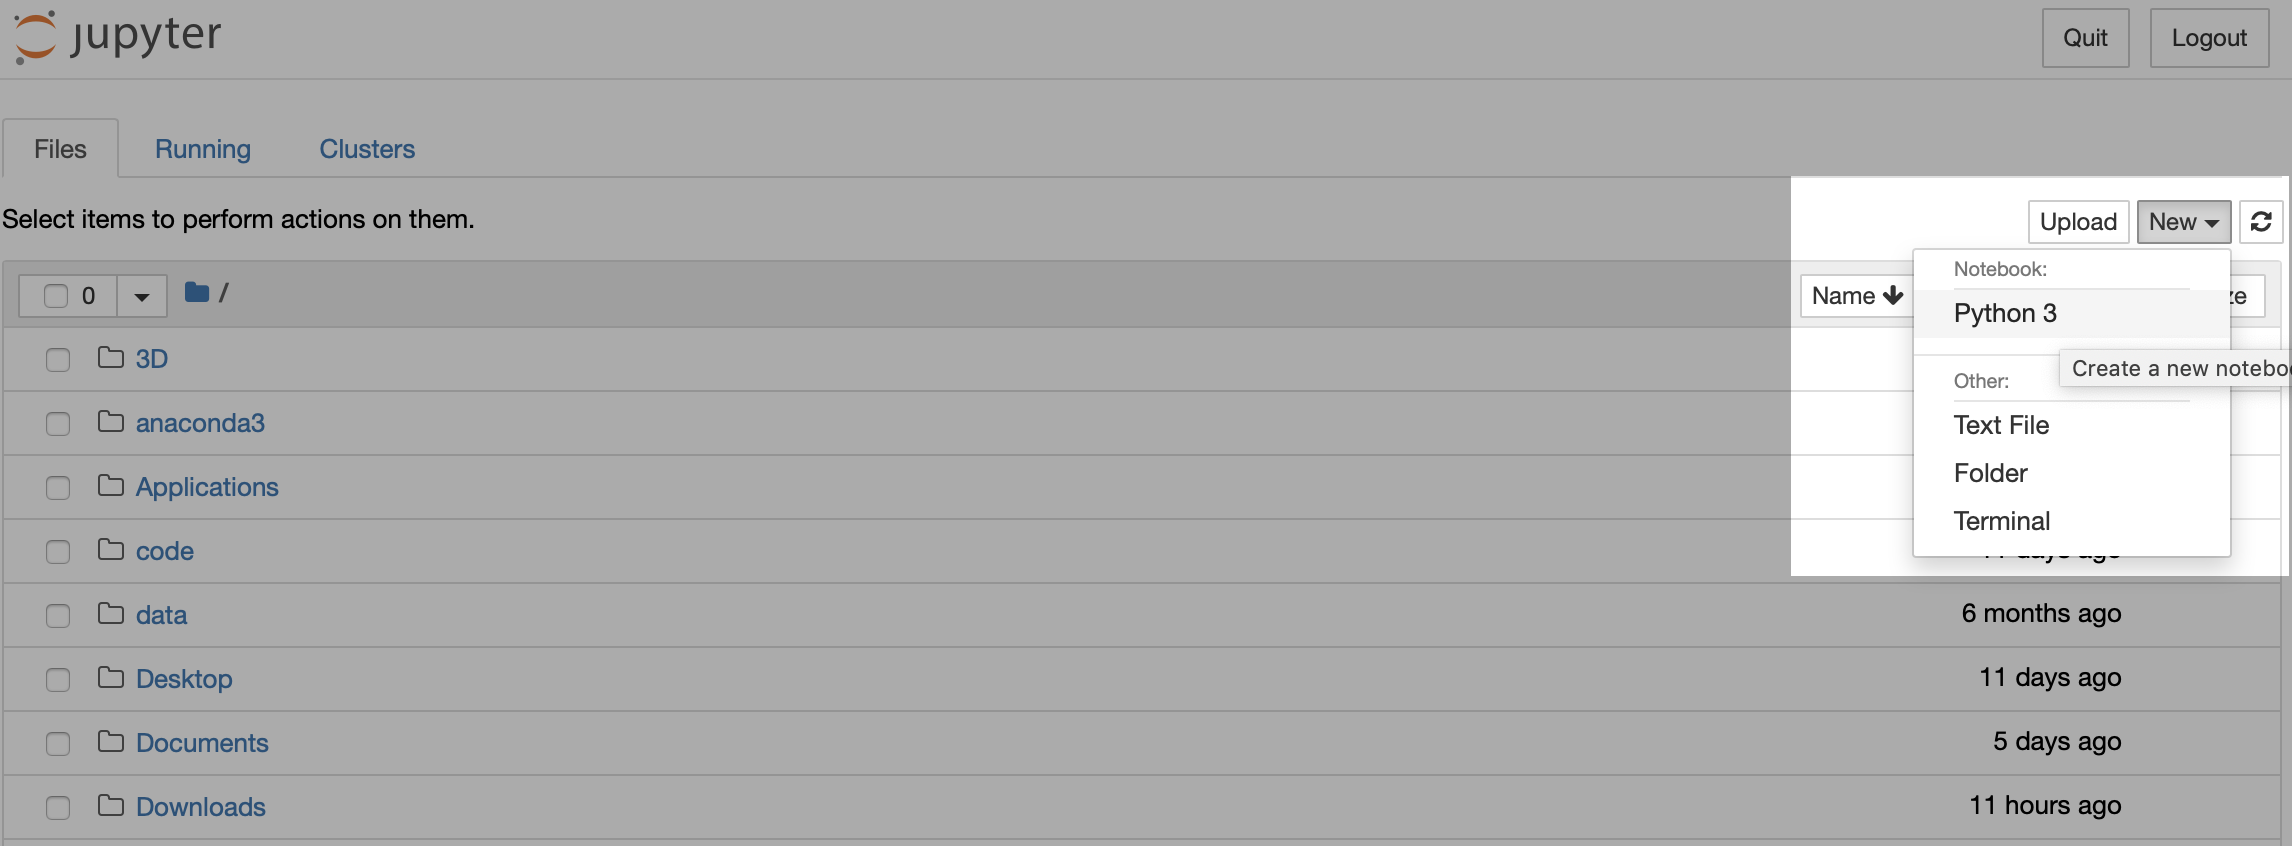
It will take a few seconds to load, but when it’s ready it will open a new tab in your web browser and show you the Jupyter interface. Jupyter runs entirely within your web browser - there is no separate application to use. Now we’ll open a new Notebook to confirm everything is working correctly.
This will open a new tab with a blank Jupyter Notebook. To check that it’s working you can type:
and then click the Run button in the toolbar to execute the code. You should see Python prints “Hello World” as output underneath the cell, and Jupyter has automatically created a new cell for you to use for your next command. We’ll double check that we’re using the right version of Python:
You should see something like this:
3.7.1 (default, Dec 14 2018, 13:28:58)
[Clang 4.0.1 (tags/RELEASE_401/final)]
The key thing to check here is that the version number at the start is 3.7.1, or higher if there has been a new version of Python released since writing.
8.3.2 Packages
Packages in Python are a little bit different to R. Whilst R has a very small number of dedicated “libraries” where packages are installed, Python can use packages from just about anywhere on your system. In fact Anaconda Python will check your home directory (MacOS) or My Documents (Windows) first whenever you ask it to load a package, before checking the standard locations. This can cause all sorts of problems if you aren’t careful with managing your packages and scripts. For example you might inadvertently save a file in your home directory as types.py, and then next time you execute any Python script which tries to import the types package it will open your script from your home directory rather than opening the package you were looking for. This could cause all sorts of problems! We’ll cover some techniques you can use to work around these issues a little later in this course.
Some examples of popular packages for data science in Python include:
- numpy - provides access to arrays and matrices, and vectorised operations
- pandas - provides DataFrame functionality on top of numpy
- scikit-learn - machine learning algorithms and training framework
- Requests - HTTP communications and web scraping
There are over 130,000 packages available through the Python Package Index (PyPI). You need to use a tool called pip to install new packages in Python, and this tool should have already been installed automatically when you installed Anaconda Python. As an example, to download and install pandas, you would open a terminal and type:
This will download pandas (as well as any packages that pandas depends on) and
install it into the appropriate folder. For the most part you can forget about
where these packages are installed, especially when using Anaconda Python as
this sets up a single folder for your installed packages. In my case, all
packages are installed into a folder called
/Users/perrystephenson/anaconda3/lib/python3.7/site-packages. You can find
out the package installation path for any package on your own system by
checking with pip:
$ pip show pandas
Name: pandas
Version: 0.23.4
Summary: Powerful data structures for data analysis, time series, and statistics
Home-page: http://pandas.pydata.org
Author: None
Author-email: None
License: BSD
Location: /Users/perrystephenson/anaconda3/lib/python3.7/site-packages
Requires: python-dateutil, pytz, numpy
Required-by: seaborn, odo
There is an alternative package installation method for Python - the conda package management system. The differences between conda and pip are fairly complex and not necessary to understand right now; we will touch on these differences in a later part of the course.
For now, you should just keep in mind that you may see people usingconda install instead of pip install, and in most cases these two commands
should have the same result.
You will learn about how to load packages - and use the functions within them - as part of the DataCamp courses below.
8.4 Learning Python with DataCamp
As a Data Scientist working in a business you would be expected to have at least one programming language (R or Python) in which you can:
- Import datasets from files and databases
- Manipulate, aggregate and summarise datasets
- Create compelling visualisations
- Train and evaluate models
In order to develop the first three skills on the list (we won’t have time to learn about modelling in this course), students will be given two assignments on DataCamp, which are compulsory but will not be assessed.
| Subject | Topics |
|---|---|
| Introduction to Python | Basics, lists, functions and packages, numpy arrays. |
| Intermediate Python for Data Science | Visualisation, pandas DataFrames, logic, control flow, filtering, loops. |
These two courses will provide a basic foundation in how to use Python to perform basic analysis tasks. If you are new to programming, these two courses will take you from not being a Python user to being able to manipulate datasets and perform complex analysis.
If you intend to use Python as your primary language, you should also consider attempting to complete DataCamp’s Data Scientist with Python career track which includes most of the Python skills you’ll need as a professional data scientist. This will take you significantly longer than a single semester to complete, but you can make a start any time.
8.5 Other Python Resources
| Resource | Notes | Cost (AUD) |
|---|---|---|
| Python Data Science Handbook | Python Data Science Handbook is a book aimed at people who already know Python, but want to learn how to use the Python Data Science stack. | Free! |
| Python for Data Analysis (2nd Ed) | Python for Data Analysis (UTS Library link) is a book which caters to users who are new to programming. It is written by Wes McKinney, the creator of the pandas package. | $40 (free from UTS Library) |
| Learn Python the Hard Way | Learn Python the Hard Way is an online course which helps you learn about Python from basics, ignoring the data-specific packages and focusing on thoroughly understanding the basics. | USD$29.99 |